Friday, December 25, 2009

PRIVATE STOCK


Supplies used:


I used a beautiful new PTU kit by Shal. You can purchase this kit at Mistaken Art. . I used a wonderful Glitter-2010 tube by Keith Garvey. His art may be purchase at My PSP Tubes.
I used Vix Mask 196 and you can find all her goodies here.


Ok, let’s get started!

1. Open 600 X 600 image with transparent background.

2. Add a white layer to show all your layers more clearly.

3. Open the Happy 2010 Frame and reduce by 80% and paste as new layer. I rotated it slightly.

4. Open star curtain and reduce to 75%. Copy and paste as new layer under the frame.

5. Fit it inside the frame.

6. Next fit the close up of a tube of your choice Erase anything showing below the frame.

7. Open Bow 1 and reduce to 70% and paste as a new layer on top of the tube layer.

8. Open the champagne bottle, reduce to 70%. Copy and paste as new layer and arrange to the left.

9. Open Bow 4 and reduce to 40%. Here I wanted to add an additional color and used the green in the bottle to color it. Use Adjust, Hue & Saturation settings at 95-171 for the green.

10. Click on bottom white layer and add a new layer. Make your foreground the same color green. Apply Vix mask 196. Merge group. Next, add a new layer and fill this with black and apply the same mask. Merge group.

11. Now open Paper 19, copy and paste as a new layer. Merge group again. Next I just pulled up on the green and black masks to barely show above the Paper 19.

12. Next open the black balloon 1 and lower the opacity to 85%.

13. If you would like to make a label on the bottle as it is in the tag, change the foreground color to #dfc467 and close the bottom layer. Click on the Eclipse tool, width of 2 and draw out a rather wide oval.

14. Take your magic wand and click inside the yellow oval and fill with black. Add your name and anything else you would like it to say using a small font, then change to raster layer

15. Open Hat 4 and reduce to 60% and color it green like the bow. Click on adjust, Brightness and Contrast and make the brightness -35 to shade it a little.

16. Next I opened the champagne flute 1 and reduced the size to 40% and pasted as a new layer. Duplicate and arrange glasses. I clicked on the white layer and added Doodle 1 and made smaller to just show in the top right corner.

17. I placed a streamer under the bow and added Horn 1. Then I used Penhurst font and put “Let’s toast to the New Year…” in green and did a Gradient Glow in black. If you don’t have Eye Candy, you can do 1 stroke with your green text.

18. Put your copyright where it can be seen clearly and any watermark you use. Then click and close the white layer and save as a png file.

Hope you enjoyed this tutorial. :)

Friday, December 18, 2009

PSP VALLEY


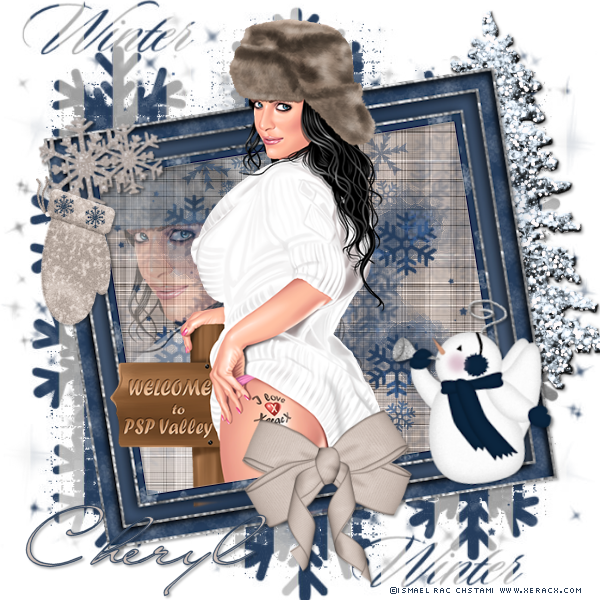
You should have a working knowledge of PSP to do this tutorial. I used the gorgeous kit by Susan from Shal’s World. You can purchase it at MPT here. I also used the work of the talented Ismael Rac and you can purchase his work at AMI.
Masks by Vix 429 and 435.

Let’s get started!

1. Open a new 600 x 600 transparent tag. Add a new raster layer and fill with white.
2. Open frame 9 and reduce to 500 x 455. Copy and paste as a new layer. Rotate slightly to the left.
3. Click on the white bottom layer. Copy Paper 5 and paste as new layer.
4. Click on Layers, load layers and apply Vix’s mask 435.
5. Click on white layer again and copy and paste as a new layers, paper 16.
6. Click on your Freehand tool, Point to Point and outline around the frame so it will have the beige background
7. Open a tube of choice. Paste as a new layer and arrange where you like.
For mine, I copied the tube and put one below the frame and went to the top one and erased everything below the frame. If needed, also erase some of the bottom tube so it appears that she is coming out of the frame.
8. Click on the layer with the bottom tube and pasted a close up of the same tube and lowered the opacity to 40%.
9. Open paper 24 and paste as a new layer above the bottom white layer.
10. Apply Vix mask 429 and pull a little larger to show around frame.
11. I resized the beige mitten to 84 x 150, copied and pasted on top of frame. I also placed  Bow 1 at the
bottom of frame. I also clicked on the white bottom layer and added the tree 2 and arranged in the upper right (refer
to mine) Add or leave off any decorations to make it the way YOU like it.

12. Do Effects, 3D effects, Drop Shadow of 2-2-30-3 on every layer but the top tube layer.
13. Place correct copyright where it is clearly visible and any watermark you have.
14. Put your name using any font you favor.
15. Close off the white background and save as a png file.

I hope you have enjoyed this tutorial!

NAUGHTY OR NICE?


You will need a working knowledge of Paint Shop Pro for this tutorial. I used PSP X2, but it will work in any version.
Supplies:
I used the gorgeous tube by Jose A. Cano that I got free from MPT’s Christmas gift 2009. You can purchase Jose’s work at My PSP Tubes.
The beautiful scrapkit is by Shal World. You can also purchase her kit at My PSP Tubes.

I made the mask to be used in the background, put this in your mask folder.MASK
I also applied a shadow of 2-2-40-3 to all layers except the bottom tube layer.

 
Let's get started!
 
1. Open a 700 X 700 transparent image. Add a layer and fill with white.
2. Open Paper 13 and copy. Add a raster layer, Selections, Select All. Edit, paste into selection. Select None.
3. Layers, Load Mask from Disk and apply Cheryl Mask 1. Merge Group.
4. Open, copy and paste as new layer Frame 1.
5. Open Ribbon Wrap 4, copy and paste to left side of Frame.
6. Click on Frame layer. Grab your magic wand and click inside frame and Modify and Expand by 15. Invert Selection.
7. Copy and paste Paper 5 and hit delete.
8. Next, I grabbed the corners of mask layer and made it just show slightly below the frame. Use your own judgment here.
9. Open tube of choice (close up) and paste above the frame layer. Duplicate and drag copy below frame. Go back to the top layer of tube and erase the bottom so she appears to be coming through the frame.
10. Copy and paste as a new layer the Christmas tree.
11. Open presents and resize 50%. Copy, paste them as new layer and arrange around the tree. I also put one behind to create depth and made them different sizes.
12. Open curled ribbon 2 and resize to 60%. Duplicate and stretch slightly so it is longer than the first one.
13. Copy and paste peppermint stick below frame and to the right. (refer to mine)
14. I spelled my name with the red alpha and resized to 50% and arranged down the right side above the Peppermint stick.
15. I used “What is on y our Naughty or Nice list” for the tag title. You can use this or make your own.
16. Drop shadow all but the top tube layer with 2-2-50-5.
17. Resize tag to 55o X 550 pixels.
18. Place copyright where it can be read clearly.
Feel free to use different elements to give it your own look. This tutorial is only meant as a guide.
Have fun and I hope you enjoyed this tutorial!!

CHRISTMAS WISHES


You should have a working knowledge of Paint Shop Pro. I used PSP X2 but it should work for all versions.

A used a beautiful PTU kit from Shal, Wintergreen Wonderland. Thank you Shal, for creating such wonderful scraps. You can purchase Shal's kits here .

I used a mask by Sabre Lindsay at The Quill & Parchment . Be sure to explore his site, he has wonderful freebies.
(the mask needed is in the two Winter masks towards the bottom of page) Put in your Mask folder.

Wordart made from Susan's kit and used with permission, please do not share. It is for use with this tutorial only.


Let’s get started!


1. Open a 600 X 600 blank transparent image

2. Open Paper 12, copy and paste as new layer

3. Layers, Load Mask and Load mask from disk

4. Find Sabre’s Christmasmask2quill and apply mask and merge group. Rotate slightly to left.

5. Stretch mask so it fits the tag edge (so after we put the frame in, it will show on all sides)

6. Right click on the mask layer and duplicate.

7. Merge Down.

8. Click on the bottom layer and do the same with Paper 10.

9. Duplicate that also and merge down. Rotate the gray bottom layer so it shows below the green

10. Open Frame 2, Resize to 90% and copy and paste as new layer.

11. Use your Magic Wand and click inside the frame. Selections, Modify and Expand 15 pixels.

12. Invert selection. Click on green mask.

13. Copy Paper 10, paste as new layer and hit delete. Selection, Select None.

14. Click on the frame layer and copy and paste as new layer your tube of choice.

15. Duplicate and drag below the frame. Click on top tube layer.

16. Using the eraser erase the bottom of tube to fit inside of frame. (see tag)

17. Before decorating the frame, go to image, canvas size and increase to 700 X 700.

18. Place the word art and decorations as you like ( I resized 50%) and make it your own.

19. Crop excess white space and resize tag to 550 X 550

20. Put your name and copyright where it can be seen.

21. X out the white bottom layer and export as a png.

Hope you enjoyed this tutorial!


GIVE THANKS


Supplies needed:


You will need a working knowledge of Paint Shop Pro to do this tutorial.

I used PSP X2 but it should work great with any version.

I used a gorgeous kit made by my good friend, Shal. You can purchase her art at Mistaken Art.

I used an adorable tube by Suzanne Woolcott and you can purchase her tubes here.

Vix mask 143 which you can add to your Mask folder. You can find her wonderful masks here.

1. Open a transparent new image 550 X 550

2. Open round frame 2, copy and paste as new layer and lower opacity to 60%

3. Open paper 1. Resize to 550 pixels and copy and paste as new layer.

4. Go to Layers, Load Mask from disk and find Vix 143 mask and apply and merge group.

5. Open the wood frame, copy and paste as a new layer. Rotate slightly to the left.

6. Take the magic wand and click inside the wood frame and then Selections, Expand 20, then invert.

7. Open and copy striped paper 5, paste as new layer and hit delete. Place below the frame.

8. Click on the striped paper, copy your tube and paste as new layer. Grab the corner to resize to fit inside the frame, rotate slightly and lower the opacity to 70%

9. You can use any wording you would like, I choose Lansbury font and used Eye Candy 5, Gradient Glow orange, then beige.

10. Open Flowers 1 & 2 and resize to 50%. Copy and paste them to your liking.

11. Open Tag 2 and reduce to 40% and paste as new layer under the flowers

12. Open the black curled ribbon 5, copy and paste on top of tag and under the flowers.

13. Copy and paste your tube of choice and place to the right of the frame.

14. Go back to each layer and apply a drop shadow of 2-2-30-5

15. Make a new raster layer and put the copyright where it can be read easily.

16. Add your name to the tag and use a drop shadow

17. Close the bottom white layer and Export as a png.

I hope you enjoying this tutorial!


BLUE BELLS RING


Supplies needed:


I used Lansbury font which is a FTU that can be found here .
A wonderful FTU Christmas kit by Creation of Sanie you can find at her blog here .
Mask 301 by Vix you can find on her blog here .


Let's Get Started!


1. Open a 600 x 600 transparent tag.

2. Open Paper-39 and resize to 600 pixels. Copy and paste as a new layer.

3. Layers, load mask, Vix mask 306, merge group.

4. Duplicate this layer and mirror. Pull it down so you have the flakes at the bottom right too.

5. Open bulb 34. Copy and paste as a new layer and rotate to the left and move down. (refer to tag above)

6. Open bulb 89, copy and paste as a new layer and rotate to the eft and arrange like the tag shows.

7. Open tube of choice close up. Copy and paste as new layer.

8. Image, Resize, Uncheck Resize all layers and reduce to 85%

9. Open element 58, copy and paste as new layer. Resize just that layer (uncheck all layers) and make 85%

10. Arrange to cover up the bottom of tube edge that is cut off in a close up.

11. Open element 119. Copy and paste and make smaller for the corsage.

12. Open element 48. Copy and paste and move to the right side of tag.

13. Resize to 525 X 525 pixels.

14. Apply your copyright and watermark.

15. Add name to upper right corner. I used Lansbury font with this color #5d2038 and put a white gradient glow on it.

16. Close off bottom white layer and save as a png.

I hope you enjoyed this tutorial!


Thursday, December 17, 2009

STALKER LOVE RULES


You should have a working knowledge of Paint Shop Pro to do this tutorial.


You will need a close up and body tube of the same artist.

I used the wonderful art of Ismael Rac.
(This particular tube is an Exclusive Commission that isn't for sale)

You can purchase Ismael's work at AMI  here .

Scrapkit is a FTU kit can be found at Designs by Ali called “All About Love”.
Look around, she has some beautiful scraps.

I used two masks by Chelle, WSL 221 and 222.
You can download these masks from her blog here .

WordArt provided by me.


Let’s get started!

Open a 600 x 600 pixel transparent tag.

Resize Paper 6 to 600 x 600 and paste as a new layer.

Apply WSL Mask 221, Merge Group.

Copy close up of tube and paste as new layer.

Go to Effects, Photo Effects, Sepia Toning, Age setting at 60%

Lower opacity to 60%

Click on bottom white layer. Open Paper 4 and resize to 600x600 pixels.

Copy and paste as new layer and apply WSL mask 222.

Open Leaves1 and Leaves 2. Resize to 40 % and arrange on upper right (see mine)

Open Bow Charm 2 and use Sepia effects as above and place over leaves.

Copy the body tube of choice and place to the right of the close up.

Apply a drop shadow on all layers now. I used 2-2-50-5 settings.

Click on the Selection tool, rectangle shape and feather set to 15.

Draw rectangle on very lower of body and hit delete to feather and blend.

Open word art and arrange on the right and Drop Shadow same as above.

Add or change any elements you would prefer now.

Put all credits and copyright where it can be read clearly.

I used a thicker font with the color red #6c1314 background and a black foreground.

I put the Glitter Heard Charm 3 below and did a drop shadow.

Hide the white background and save as a png.


I hope you enjoyed this tutorial!

AUTUMN BEAUTY


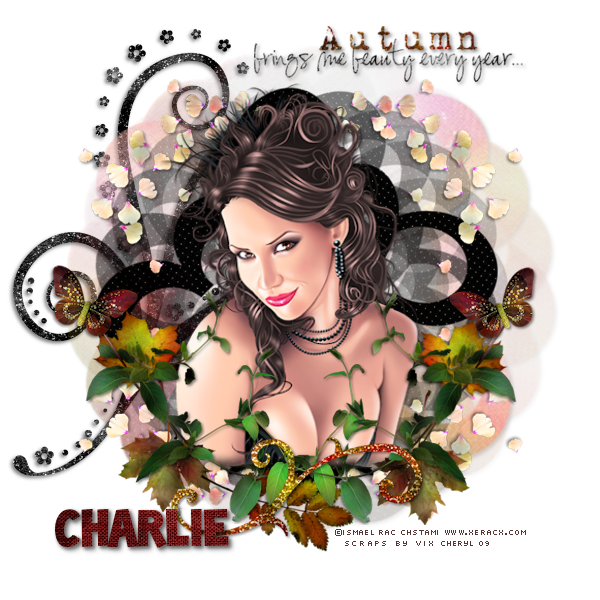
You should be experienced in Paint Shop Pro to do this tutorial. This was made with PSP X2 but should be able to be used with any version PSP.

This tutorial should be used as a guideline, do your own take on it and have fun with it.

Supplies:

I used a gorgeous tube by Ismael Rac which you can purchase here .

I have used the beautiful Autumn Song FTU scrapkit by Vix and you can find it here .

I used Vix’s Mask 232 that you can grab here .


Let’s get started!

Open a blank tag 600 x 600 and flood fill the bottom layer white so you can see the tag better.

Open a new layer and fill with black. Apply Vix mask 232 and merge group.

Click on bottom white layer and paste as new layer paper 11, apply Vix Mask 232 and grab the corners and enlarge to peek out from behind the black mask. Image, Free Rotate 45 degrees and lower the opacity to 50%.

Open, copy and place the petals in upper left corner, do a drop shadow of 2-2-50-5.

Right click and duplicate the petals, then Image, Mirror and merge down. Duplicate again and go to Image, flip. Merge down. Drop shadow as above.

Next, paste the tube of your choice and move to center of mask. Take the selection tool to draw a narrow rectangle with 15% feather at the very bottom and hit delete to blend/fade better.

RESIZE IMAGE TO 600 X 600 now.

Next, open, copy the Leaves1, and paste as a new layer, then duplicate, mirror and arrange below tube. Drop shadow as above.

Open, copy and paste leaf 2 as new layer. Image, Flip and add below the leaves, duplicate and arrange on each side on bottom. Open Leaf3, duplicate and aarrange on each side. (refer to my tag) Open and place Leaf1 at bottom of tag, turn so it is side ways.

Open, Resize to 60% and put a couple butterflies to cover the stems of the green leaves. Use the wordart you would like. Decorate and make it your own. I added a couple doodles for some sparkle. Make sure all layers have a drop shadow as above.

Next be sure to add copyright so it can be read clearly.

Add your name and drop shadow as above.

X out the white bottom layer and save as a png file.

All done. I hope you enjoyed this tutorial!